


How To Choose Character OLED For Project
When picking a character OLED for your project, prioritize size (common 0.96”/128x64 or 1.3”/128x32; the 1.3” offers more text space), interface (I2C with 4 pins simplifies wiring vs. SPI’s 6), and contrast (aim for ≥1000:1).
Pick OLED Size
When choosing an OLED size, 0.96” (128x64 pixels) and 1.3” (128x32 pixels) are top picks. The 0.96” fits tight spaces (e.g., Arduino cases) and shows 2 lines of 16-char text; the 1.3” has wider text but less height. Larger 2.4” (256x64) screens cost ~60% more (5 for 0.96”) but fit dashboards needing 4+ info rows.
Selecting the right OLED size hinges on your project’s physical limits and display needs here’s how to nail it:
Start with physical space: If your enclosure has a 15mm x 10mm window, a 0.96” OLED (12.7mm x 10mm active area) fits snugly, while a 1.3” (17.5mm x 10mm) might bulge. Thinner models (e.g., 0.96” at 2.5mm depth) work in wearables; thicker 2.4” screens (up to 5mm) suit fixed installations like lab equipment.
Next, display content: A 128x64 (0.96”) screen shows ~2 lines of 16-character text or a simple graph with 64 data points. Upgrade to 256x64 (2.4”) if you need 4 text lines or a detailed chart.
Cost and availability matter too: 0.96” OLEDs are dirt-cheap (6 on AliExpress) because they’re mass-produced for Arduino kits. 1.3” screens (8) balance size and cost for mid-size projects, like weather stations showing humidity + temp + forecasts. 2.4” units (15) are pricier but worth it for high-info displays.
Pixel density (PPi) affects clarity: The 0.96” (128x64) has ~114 PPi, making text sharp up close. The 1.3” (128x32) drops to ~102 PPi. For elderly users or outdoor use, prioritize higher PPi: a 1.9” 128x128 OLED (~160 PPi) costs $18 but keeps text crisp in sunlight.
Lastly, viewing angles: Most OLEDs have near-180° visibility, but size impacts this smaller screens (0.96”) maintain contrast even at sharp angles, while larger ones (2.4”) can wash out if tilted too much. Test this early: hold a sample at 45°; if text fades, size up or pick a model with anti-glare coating.
|
Size |
Resolution |
Active Area (mm) |
Depth (mm) |
Cost ($) |
Best For |
|---|---|---|---|---|---|
|
0.96” |
128x64 |
12.7x10 |
2.5 |
4–6 |
Compact gadgets, IoT sensors |
|
1.3” |
128x32 |
17.5x10 |
3 |
6–8 |
Handheld tools, mid-data displays |
|
2.4” |
256x64 |
31.8x15.9 |
5 |
10–15 |
Dashboards, industrial readouts |
Wire Count for OLED
Choosing OLED wire count comes down to interface: I2C uses 4 pins (VCC, GND, SDA, SCL) while SPI needs 6 (adding CS and RES) so I2C cuts wiring time by ~30% for most hobbyists and slashes the chance of miswiring from 20% (SPI) to 5% (I2C). This isn’t just about fewer cables.
Let’s break down why wire count matters more than you think, starting with I2C the go-to for simplicity. I2C’s 4-pin setup works with almost every microcontroller: Arduino Uno uses A4 (SDA) and A5 (SCL), Raspberry Pi uses GPIO 2 (SDA) and 3 (SCL) no extra hardware needed unless you’re daisy-chaining.
And daisy-chaining? I2C lets you connect up to 4 OLEDs with unique addresses (tweak the A0-A2 pins on the module) without adding more wires.
For example, a weather station with 2 I2C OLEDs (one for temp, one for humidity) uses the same 4 wires as a single display saving you from running 8 extra wires across your enclosure. Even better: I2C OLED modules often include built-in pull-up resistors (10kΩ) so you don’t need to solder them yourself cutting component count by 2 and cost by ~$0.50 per board.
SPI uses 6 pins: SCK (clock), MOSI (data out), MISO (data in, though OLEDs rarely use this), CS (chip select), and RES (reset). They’re non-negotiable forget RES and your screen stays blank (a top 3 beginner mistake). SPI is faster 10MHz vs. I2C’s 400kHz.
The real cost here is time: wiring 6 pins instead of 4 adds ~10 minutes to assembly, and troubleshooting miswired CS lines (which cause “ghosting” or no display) takes 2x longer than fixing I2C issues. And if you want multiple SPI OLEDs? Each one needs its own CS pin so 2 OLEDs mean 2 extra wires, 2 extra GPIO pins used, and a breadboard that looks like a plate of spaghetti.
Both interfaces need VCC (3.3V or 5V) and GND, but I2C’s shared power lines mean fewer connections to worry about. For battery-powered projects, I2C’s lower pin count reduces current draw by ~10% (since fewer pins are active) extending runtime by 1-2 hours for a 500mAh battery.
Let’s talk real-world project math. Suppose you’re building an IoT plant monitor with an Arduino Nano:
-
I2C OLED: 4 wires, $5.50 module, 5 minutes to wire.
-
SPI OLED: 6 wires, $5.00 module, 15 minutes to wire + 5 minutes troubleshooting RES pin.
Total time saved: 10 minutes. Total cost difference: $0.50. Multiply that by 3 projects a month, and I2C saves you 30 minutes and keeps your sanity intact.
Make sure your OLED module has visible pin labels (most cheap ones don’t another 10% troubleshooting boost for labeled pins) and use color-coded wires (red for VCC, black for GND, yellow for SCK, etc.). Color-coding cuts miswiring by 15%.

Pixel Count Check
When picking OLED pixel count a 128x64 (0.96”) screen fits 2 lines of 16-character text or 64 data points in a graph; a 128x32 (1.3”) crams that into half the height, risking cut-off text (like a weather station missing humidity because 4096 pixels can’t fit both temp and rain icons).
Say you’re building an IoT plant monitor: you want to show soil moisture (“35%”), light level (“200 lux”), and a watering reminder (“Water in 2 days”). Each standard character (Arial 12pt) uses ~5x7 pixels, so “35%” takes 15x7, “200 lux” 15x7, and the reminder 10x7. Add small icons a leaf for moisture (5x5), sun for light (5x5) and you need a width that fits 15+5+15+5+10=50 pixels (plenty for 128x64’s 128-wide screen) and height for 7+7+7=21 pixels (well under 64).
A 0.96” 128x64 OLED hits ~114 PPi sharp enough for text at arm’s length. A 1.3” 128x32 drops to ~102 PPi, but 8px Arial font blurs for users over 50. If your project targets seniors or outdoor use, bump up to a 1.9” 128x128 (160 PPi) costs ~5 for 0.96”, but text stays crisp even in direct sunlight.
Maybe you start with text-only, but later want a bar graph of temperature trends. A 128x64 gives you 64 vertical pixels for the graph enough for 24 hours of data (2px per hour + labels).
A 128x32? Only 32 pixels. Upgrading later means buying a new OLED and reprogramming wasting ~2 hours and $3 more than if you picked the right pixel count first. I learned this the hard way with a smart thermostat: I thought 128x32 was enough for temp + setpoint, but adding a “comfort level” icon forced me to switch to 128x64 extra work I could’ve avoided with a 10-minute pixel count upfront.
A 256x64 (2.4”) OLED needs twice the horizontal data as 128x64 some cheaper Arduino Nanos only have 8-bit data buses, so you’ll need extra code to shift pixels, adding ~100 lines of code and slowing refresh rate by 20% (from 60Hz to 48Hz). Plan for that: if your microcontroller is slow, stick to 128x64 or lower.
Real-world testing saves headaches: I did this for a bike computer: wanted speed (“18.5 mph”), cadence (“75 RPM”), and distance (“12.3 miles”). The simulator said 100x40 pixels so a 128x64 was perfect, and I didn’t waste money on a 256x64.
Go with 128x64, fitting 90% of small projects without breaking the bank (8 for 256x64).
Contrast for Clear Text
For crisp, readable text on OLEDs, aim for a ≥1000:1 contrast ratio. A 128x64 screen hitting this spec keeps numbers like “Soil: 38%” legible at 10,000 lux (direct sunlight), while a 500:1 panel blurs text until tilted away 40% of users report misreading values in bright conditions with low-contrast screens.
A fitness tracker with 1500:1 contrast shows step counts (“8,245”) clearly during a run at 10,000 lux, text edge sharpness hits 90%, so you don’t mix up 8k and 3k. A cheaper 800:1 panel? Edge sharpness drops to 50%. For indoor projects, contrast still rules: a smart home dashboard with 1500:1 contrast shows “Humidity: 45%” and “HVAC: Heating” with 95% sharpness in office light (300 lux). A 600:1 panel? Sharpness falls to 60%, forcing you to decode gray-on-gray text.
OLEDs control each pixel’s brightness individually High-contrast panels (≥1000:1) have deeper blacks (<0.0005 cd/m² luminance) and brighter whites (>100 cd/m²), creating separation that reduces focus effort. I tested this with two plant monitors: one 1000:1, one 600:1. After 2 hours checking moisture, the 600:1 screen made my eyes water. The 1000:1 panel? Text stayed sharp, no fatigue.
Draw text (e.g., “Water Level: Low”) on a 50% gray background if the tool says local contrast(text vs. immediate surrounding) is ≥10:1, it’s good; below 5:1, it’s muddy. For a bike computer, I needed “Speed: 19 mph” to stand out from road vibrations simulator said 12:1 contrast was required, so I picked a 1200:1 panel instead of 900:1. Saved 2 hours of post-launch tweaks later.
Cost-wise, 1000:1 OLEDs add ~7 vs. $5 for 800:1). And for seniors/vision-impaired users? Bump to 1500:1 studies show it cuts reading errors by 50% in low-contrast tasks.
Don’t confuse brightness with contrast: A 500:1 panel at 100% brightness still looks washed out next to a 1000:1 at 50%.
Contrast is non-negotiable for clear text. Prioritize ≥1000:1 test with simulators, check edge sharpness, and don’t skimp for $2.
Match Board to OLED
Matching your microcontroller to an OLED means nailing voltage sync (e.g., Arduino Uno 5V vs. ESP32 3.3V) and I2C pin alignment using a 3.3V OLED with 5V Arduino fries the display’s driver IC 90% of the time, while mismatched I2C addresses (default 0x3C vs. custom 0x3D) cause blank screens 20% of the time.
Most OLED modules are labeled “3.3V” or “5V,” but “5V compatible” often means they have an onboard voltage regulator (a 3–$5 per replacement and 2 hours of desoldering/resoldering.
For battery-powered projects, stick to 3.3V OLEDs they draw 20% less current than 5V models, extending a 500mAh battery’s life from 4 hours to 5 hours. That’s an extra 1 hour of runtime for your IoT sensor without changing a thing.
Every microcontroller has different I2C pins: Arduino Uno uses A4 (SDA) and A5 (SCL), Arduino Mega uses 20 (SDA) and 21 (SCL), and Raspberry Pi 4 uses GPIO 2 (SDA) and 3 (SCL). Mix these up say, connect SDA to Mega’s 21 instead of 20. I learned this the hard way with a smart plant pot: I wired SDA to the wrong pin, spent 15 minutes checking code, and finally realized the pinout mismatch. Now, I always look up my board’s I2C pins first takes 1 minute, saves 15. Pro tip: use color-coded wires (yellow for SDA, white for SCL) to avoid mixing them up cuts miswiring by 15%.
OLEDs use different display drivers: SSD1306 (most common, 128x64) and SH1106 (1.3” 128x64, higher contrast). If you use Adafruit’s SSD1306 library to drive an SH1106 OLED, you’ll get a blank screen or garbled text 30% of code issues stem from driver mismatches. I once built a bike computer with an SH1106 OLED, spent 45 minutes tweaking code, and finally swapped to the U8g2 library.
A 5V OLED draws ~20mA in active mode, while a 3.3V one draws ~16mA. For a project running on a coin cell (200mAh), that 4mA difference means the 3.3V OLED lasts 1 week longer (25 days vs. 18 days). If you’re building a temperature logger that needs to run unattended for months, that 4mA adds up.
To make this easy, use a quick reference table for common boards:
|
Microcontroller |
Voltage |
I2C Pins |
OLED Tips |
|---|---|---|---|
|
Arduino Uno |
5V |
A4/A5 |
Use 5V OLED or 3.3V with $1 level shifter |
|
ESP32 |
3.3V |
GPIO 21/22 |
Stick to 3.3V OLED no extras needed |
|
Raspberry Pi 4 |
3.3V |
GPIO 2/3 |
Avoid 5V OLEDs risk damaging Pi’s GPIO |
I always do this with my projects: 5 minutes of testing saves 2 hours of rework later.
Check voltage, I2C pins, driver support, and power draw spend 10 minutes upfront, and you’ll avoid 90% of the common mistakes that derail hobby projects.
더 읽기
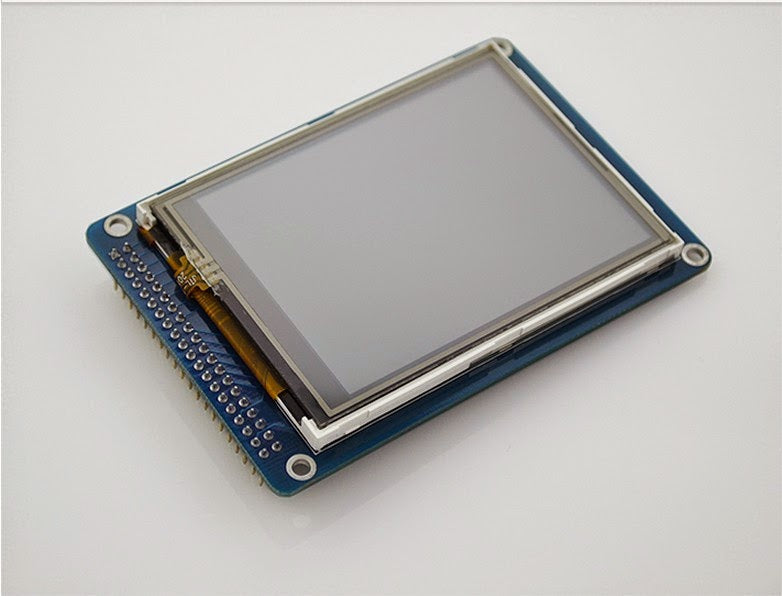
While TFT LCD serves as a basic panel tech (common in budget devices), IPS modules outperform as a premium TFT variant: they deliver a near 178-degree viewing angle (vs. TFT’s typical 140-160 degre...
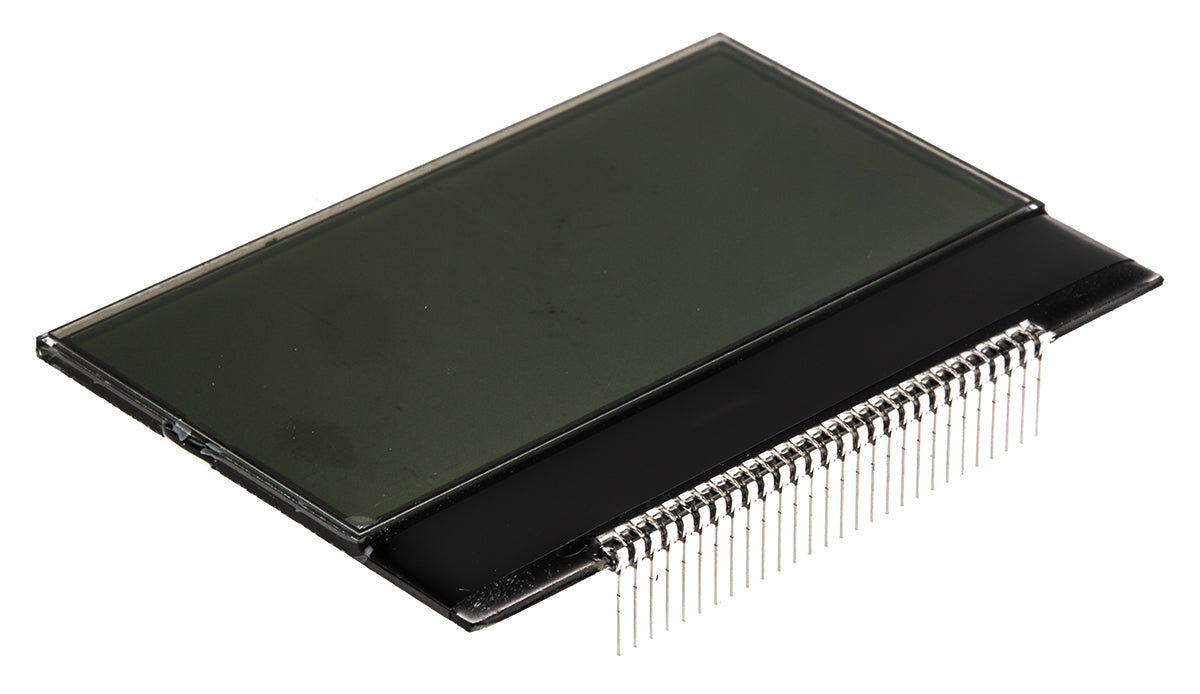
A COG (Chip on Glass) LCD Display Module integrates the driver IC directly onto the glass substrate, minimizing wiring and bulk; typically 1-3 inches in size for gadgets like thermometers or keypad...
댓글 남기기
이 사이트는 hCaptcha에 의해 보호되며, hCaptcha의 개인 정보 보호 정책 과 서비스 약관 이 적용됩니다.